30 Ocak 2012 Pazartesi

31 Day Nail Challenge – Day 1: Red Nails


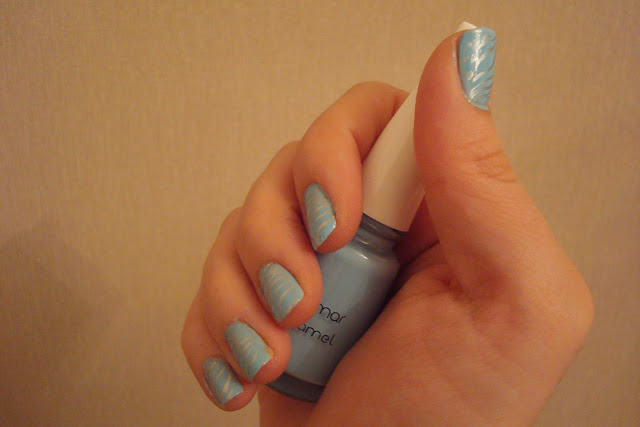
31 Day Nail Challenge postlarını takip etmeyi çok seviyorum, ama özellikle ileriki aşamaları büyük ölçüde freehand nail art gerektirdiğinden ve bu konuda deneyimim olmadığından cesaret edememiştim. Yine de konunun hazır olmasının manikür çalışmasında insanı rahatlattığını fark ettiğimden ve beni geliştireceğini düşündüğümden başlamaya karar verdim. Her gün oje değiştiren bir insan değilim, dolayısıyla challenge’i tamamlamam 2 aydan fazla zaman alacak diye düşünüyorum.
İlk gün için Pastel 99 numaralı kırmızı ojeyi kullandım. Kırmızı oje sürmeyi özlemişim, açık renklerdeki 3-4 kat sürmeden opaklaşmama sorununu yaşamamak güzel. Kırmızı ojelerde genellikle fırça izi görünmesi sorununu yaşarım ama bu ojede onu da yaşamadım. Birçok blogda ilk challenge’ın ilk günlerinde de nail art yapıldığını gördüm ama sanırım ben ilk günler için sadelikten yana olacağım, bakalım ilerleyen günler ne gösterecekJ

In English:
I really enjoy reading 31 Day Nail Challenge posts, but I couldn’t dare starting one myself since some posts require some serious freehand nail art with which I am not very familiar with. Still I decided to give it a try, realizing having a  preset “theme” is a relief, and this challenge will be a change to improve my skills. I usually don’t change my polish daily, so I assume that it will take more than 2 months to complete this challenge.
For the first day, I used Pastell 99 in red. I noticed I missed the good old red on my nails, and it was also nice to have opaque color without applying 3-4 coats. I usually see annoying brush strokes with red, but I didn’t see any strokes with this polish. Many bloggers use nail art even on the first days of challenge, but I guess I will keep it simple for a while, but we’ll seeJ

27 Ocak 2012 Cuma

Pastel 73 Nude and Black Konad - Pastel 73 ve Siyah Konad


Sonunda Özgürce Pazarlama’dan ilk beyaz ve siyah Konad special ojelerimi aldımJ Perşembe verdiğim sipariş Salı elime ulaştı ve siyah ojeyle ve çeşitli Born Pretty Store diskleriyle ilk denememi yaptım. İlk Konad setim olan tirnaksusleme.com’dan aldığım B seti maalesef orijinal çıkmamıştı (ojelerin ve paketin hiçbir yerinde Konad ibaresi yok) ve sanıyorum bu yüzden özellikle beyaz ojeyle yaptığım desenler hiç tam çıkmıyordu. Siyah oje ise ilk başlarda iyiydi ama birkaç ay içinde soluklaşmaya başladı. Siyah Konad ojeyle yaptığım ilk deneme ise bana bunla zaman boşuna yorulmuşum dedirttiJ

Bu manikür için Pastel 73 nude ojeyi 3 kat olarak kullandım, şişedeki hali bildiğiniz fondöten rengi gibi. İlk sürdüğüm hali çok turuncu geldiği için hoşuma gitmedi ancak zamanla sanki biraz pembeleşti veya benim gözüm alıştı:). Sağ başparmağımdaki tüy desenini bloglardaki Black Swan temalı manikürlerde keşfettim ve bu manikürde de favorim oldu. Cilayı çok beklemeden sürdüğüm için desenler biraz bulanıklaştı ama genel olarak sonuçtan memnunum. Bu manikür ilginç bir şekilde uçlardan çıkmadan 3 gün dayandı, nedeni oje mi yoksa Konad yaparken uyguladığım baskı mıdır bilemiyorumJ

In English:
I finally got my first Konad Special Polishes in black and whiteJ I made a test drive with various Born Pretty Store plates. My first Konad B set that I bought from a website turned out to be Fauxnad (polish bottles has no “Konad” sign on them) so I was having pale results especially with the white polish. Black Konad made me pity for my previous desperate effortsJ
For this manicure I used 3 coats of Pastel 73 nude nail polish, the colour looks like a foundation in the bottle. I didn’t like it on my nails first because they seemed to orangeish, but with time they turned pink or I got used to themJ I saw the feather design on Black Swan themed manicures on blogs, and it became my favorite on this manicure. The topcoat made the designs a litte blurry but I am overall happy with the result. This mani interestingly has managed to stay for 3 days without chip, but I am not sure whether this is because of the polish or the pressure I made on nails while stamping the desingsJ

My Second Fimo Attempt – İkinci Fimo Denemem


İlk başarısız denememden sonra fimo manikürüne tövbe etmiştim ama Claires 84 lacivert oje ile tekrar denemeye karar verdim. Boş bir zamanımda fimoları topluca kestim (yuvarlak olmayanlar kesme tahtasında sabit durabildiği için ince kesmek çok da zor değilmiş aslında) ve ojeyi sürdükten sonra bu mavi-beyaz çiçekleri birer damla Japon yapıştırıcısı (kokusu berbat) eşliğinde yapıştırdım ve cila sürdüm. Başparmak ve işaret parmağı en aktif kullanılan parmaklar olduğu için onlara yapıştırmadım. İlk denemeye göre daha iyi olduğunu söyleyebilirim, yine de 24 saat içinde (haftasonu ev temizliği sırasında) çoğu düştü, neyse ki bir kısmını bulup tekrar  kullanırım diye sakladımJ Kestiğim diğer fimoları da (özellikle fiyonklar favorim) en kısa zamanda denemeyi düşünüyorum.

In English:
After my first attempt and epic fail, I’ve sworn off fimo manicures but I decided to give it a second chance with Claires  navy nail polish. I cut a couple of fimo sticks on my spare time (the ones which are not round can stand still on the cutting board so they are easier to slice) and I glued (the glue smelss terrible) these flowers over two coats of polish and finished with a topcoat. I didn’t put flowers on my thumb and index fingers as they are my most busy fingers. I can say the result is beter than my first attempt, still most flowers fell of within 24 hours doing housework. Luckily I was able to collect some of them for reuseJ I am planning  to try my other sliced fimos (bows are my favorite) as soon as possible.

20 Ocak 2012 Cuma

Lightning Bolt Nails – Yıldırım Tırnaklar


Öncelikle bu manikürü Nailside’daki tutorialdan esinlenerek yaptığımı söyleyeyim. Oldukça sade ve hoş tasarımlar içeren bir blog. İlk bantlı manikür deneyimimdi ve umduğumdan iyi bir sonuç elde ettim.  Adım adım neler yaptığıma bakalım:
1.     Tırnaklarımı bir gün önceden Claires 84 turuncu ojeyle boyadım. (Tüm katları aynı gün de sürebilirsiniz tabii ama yeni sürülmüş ojenin bantla sökülme riski daha büyük:S)

2.     Ertesi gün bantlardan (Scotch tape tercih edilir) her parmak için bir uzun diktörtgen ve bir üçgen kestim.

3.     Resimdeki gibi bantları yapıştırdım. Burada ucu kalkmayacak şekilde bantları tırnağa iyice yapıştırmak önemli.

4.     H&M altın renkli ojemi sürdüm. (Turuncuyla altın çok mu yakışıyor ne?)

5.     İYİCE kuruduktan sonra cımbızla ojeleri sürdüğüm yerin ters yönüne doğru bantları hızla çektim. Bazen ojeler hafifçe kalkıyor, kurumadan elimizle bastırırsak bir nebze düzeliyor. Bantların üzerine sürdüğümüz ojenin ince bir katman olması lazım, ne kadar ince sürersek kalkma o kadar az oluyor.

6.     Bantları ilk yapıştırdığım yerlerin biraz ilerisine tekrar yapıştırıyorum. (Ben tembel olduğum için aynı bantları tekrar kullandım ama titiz bayanlar boyutlarının aynı olmasına dikkat ederek yeni bantlar hazırlayabilirlerJ)
7.     Üstüne bir ince kat Flormar 382 sürüyorum ve kurumaya bırakıyorum.
8.     NasılımJ


In  English:
First of all, this mani is inspired by the tutorial I’ve seen on the Nailside, a nice blog containing neat and cute designs. This was by first tape mani experience and went beter than I expected. Let’s see what I did step by step:
1.     I painted my nails with Claire’s 84 orange the day before. (You can apply all coats at the same day, too, but the risk of smudges will be greater:S)
2.     The next day I cut out a long rectangle and a triangle for each of my nails from the Scotch tape.
3.     I placed the tapes as seen at the picture. Attention: No hanging edges, press well.
4.     I applied my H&M gold polish.  Gold and orange go suprisingy wellJ
5.     After waiting for it to DRY, I removed the tapes with a tweezer fast and to the opposite direction that I applied the polish. You can press back the smudges carefully.  A thin coat means less smudging.
6.     I placed the tapes again, a little further than their old places. (As a lazy girl I reused the tapes but you ladies can cut new tapes with the same size)
7.     Finally I apply a thin coat of Flormar 382, let it dry and remove the tapes.
8.     Not bad, huhJ

13 Ocak 2012 Cuma

Snowflakes


Bu geç kalmış yılbaşı manikürü geçen haftadan. Fotoğraf makinemi bulamadığım için telefonla çektiğim kötü ışıklı fotoğraflarla idare edeceksinizJ Oje Claire’s in muhteşem turkuaz ojesi (farkında olmadan 2 tane almışım), üstüne Flormar 112 gümüş ile m59 diskindeki kar tanesi desenlerini yaptım. Az uğraştığım ama sonucunu beğendiğim bir manikür oldu. Saatlerce uğraşıp trajik sonuçlara ulaştığım bir manikürü de ileriki günlerde paylaşacağımJ


In English:
This late-Christmas mani is from last week. I couldn’t find my camera at that time, hence the bad-lighted mobile phone photographyJ I used Claire’s fabulous turquoise polish (I accidentally bought two) and stamped the snowflakes on m59 plate with good old Flormar 112 silver. This was a nice result that came with little effort. I will show you the evidence of a  tragic result which took me hours to make very soonJ

10 Ocak 2012 Salı

Fimo

Sanıyorum şu ana kadarki en sinir bozucu manikür deneyimini fimolarla yaşadım. Başlangıçta her şey güzeldi, Born Pretty Store’dan aldığım sevimli şekillerle dolu 100’lü fimo paketini beraber gelen jiletle sucuk gibi keserken çok eğlendim, Claires’in limon sarısı ojesinin üstüne renksiz cilayla fimoları yapıştırırken de fazla zorluk yaşamadım. Ama fimoların tırnağımda bıraktığı pürüzlü histen hiç hoşlanmadım. Saçıma, elbiselerime takılıp durdular ve 24 saat içinde tamamına yakını gerilerinde kratere benzeyen çukurlar oluşmuş ojeler bırakarak düştü. Sanıyorum fimolarla güzel bir sonuç elde etmek için dikkat edilmesi gerekenler: 1. Fimoları çoook ince kesmek (özellikle yuvarlak fimolarla bu çok zor ama çok keserek tecrübe kazanabiliyorsunuz) 2. Takma tırnak yapıştırıcısı kullanmak (paketle beraber Japon yapıştırıcısı gelmişti, zarar verir diye kullanmadım) 3. Mümkünse fimolar tırnağınızda olduğu sürece ellerinizi kullanmamakJ
Tek resmi  tırnak etlerimdeki ojeyi temizlemeden çekmiş olduğum için Pixlr’da düzeltmeye çalıştım ama sanırım daha beter olduJ
In English:
This was probably the most frusturating manicure experience ever. At first things were nice, I had lots of fun slicing my cute Born Pretty Store (100 pack) fimos like sausages, and didn’t have a hard time placing them over yellow Claire’s polish with transparent topcoat. But I didn’t like the rough feeling of having “things” on my nails. They kept on sticking on my hair, clothes, and within 24 hours, most of them escaped my nails leaving huge polish craters. I guess to succeed with fimos, you should: 1. Slice fimos very, very thin (hard with round fimos but you can gain experience by practise) 2. Use false nails glue (the package came along with all purpose glue which I didn’t use) 3. Not use your nails the entire time if possibleJ
I made the only Picture before I cleaned up the sides, I tried to airbrush it on Pixlr but I guess I made it even worseJ

Flormar 423 + Flormar 112


Flormar 423 geçen yazın en çok aranan renklerinden biriydiJ Gerçekten çok tatlı bir bebek mavisi, kardeşi Flormar 424 (su yeşili) de öyle. Bu tarz renkleri tek başına nedense kullanamıyorum, o yüzden üstüne Flormar 112 (gümüş) ile desen yaptım. Flormar 119 yoğun yapısıyla baskıya çok uygun.  Born Pretty Store disklerinden m59’daki zebra desenini kullandım, BPS diskleri Konad’a göre biraz daha küçük, benim gibi çok uzun tırnak kullanmayanlar için sorun oluşturmuyor ama daha uzun/geniş tırnaklar için tek baskı yetmeyebilir, birden fazla baskı yapıp desenlerin birbirini tamamlamasına çalışmak da oldukça sinir bozucu.

In English:
Flormar 423 was one of the most popular colors amongst nail polish addicts last summerJ It is a very sweet baby blue, I also like (but yet don’t own) its sister Flormar 424. I  am not used to wear this type of colors alone,so I stamped on it with Flormar 112, a thick texture shade suitable for konading. I used the zebra shape m59 from my Born  Pretty Store plates. Shapes on  BPS plates are smaller than Konad plates. For those who don’t have very long nails (like me) it doesn’t cause a problem but one stamping may not cover a very long/wide nail, and multistamping somesimes leads to frustrating results.


Pastel 16

Son güncellemeden sonra uzun bir süre yeni post yapamadım, açıklamalarla başınızı ağrıtmadan doğrudan manikürlere geçmek istiyorumJ Yazmadığım zamanda  bayağı bir manikür fotosu birikti elimde, şu anda ellerimde olan ojeyle başlamak istiyorum. Pastel 16, Chanel Peridot ile Chanel Graphite arası diyebileceğimiz metalik bir renk. Pastel ojelerin çoğu gibi uygulaması kolay. 2-3 kat uygulayacak sabrım yoktu, o yüzden tek kalın kat sürdüm, rengini verdi ama ışıkta gördüğünüz gibi tırnak çizgim biraz belli oluyor.
In English:
It’s been ages since the last update, but i want to keep posting as if nothing has happenedJ I have a bunch of mani photos that i made in the meantime, and i’m starting with what i have now on my hands. Pastel 16 is a metallic color, somewhere between Chanel Graphite and Chanel Peridot. Easy to apply as most Pastel polishes. I didnt’t have the patience to apply many layers, so I only applied one thick layer. Camera flash shows my tip linesL